Friday, November 19, 2010

Birthdays and Glossy Cardstock

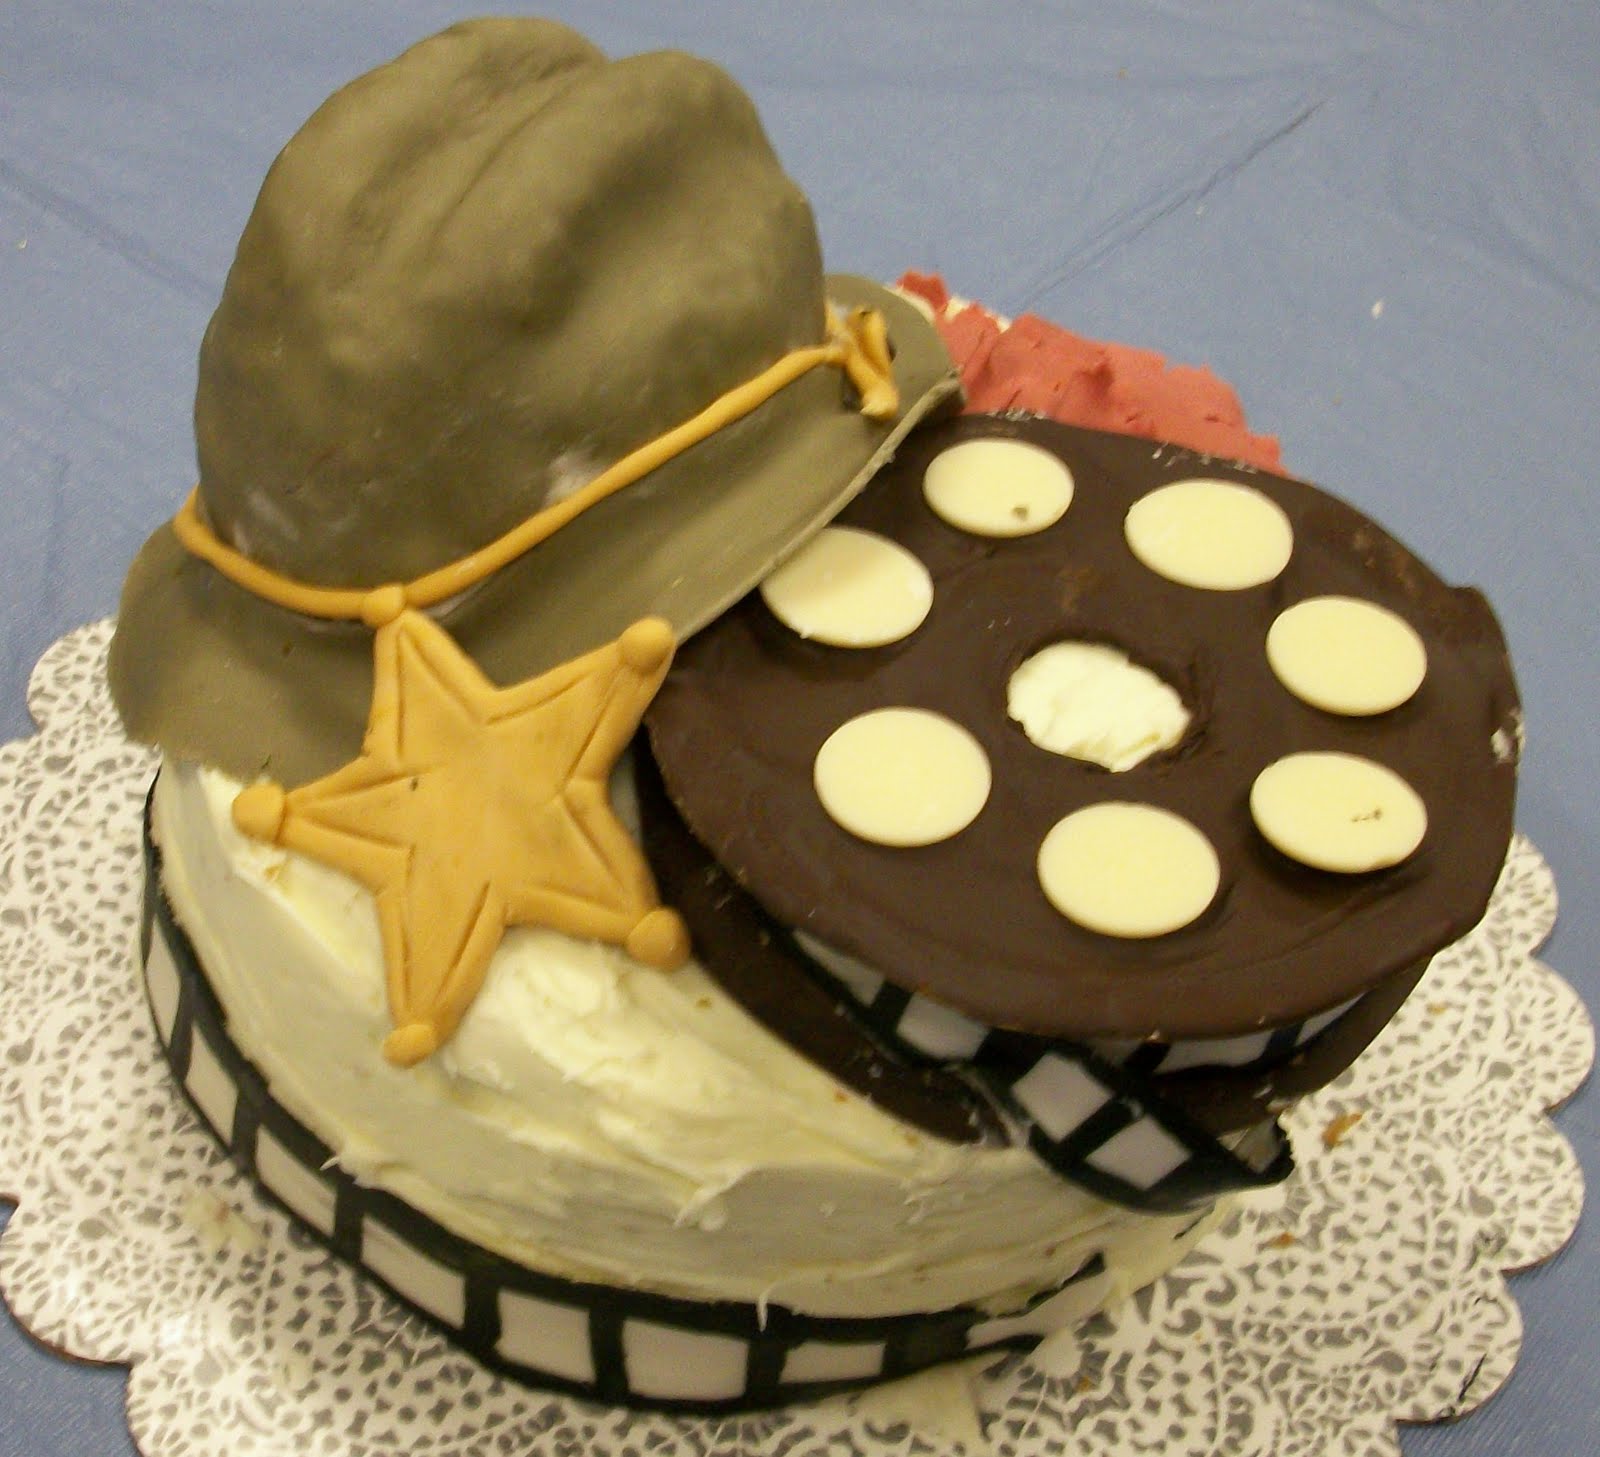
My granddaughter created another birthday cake. This was for my husband's birthday. He loves western movies, especially the old black and white movies. So this is the cake she made in his honor.


The hat is molded rice krispie treats covered with fondant. The sheriff badge is rolled fondant.


Here is another view that shows the movie reel. She drew circles on waxed paper, then filled the circles with melted chocolate. When the chocolate set she used these for the top and bottom of the reel. The circles on top of the reel were white chocolate melts. The film cascading around the cake was rolled fondant that was painted with black food coloring.


It was difficult to put candles on this cake so I made some cupcakes. My husband and my 2 youngest grandsons are in this next picture and the oldest is helping blow out the candles. I guess there were too many candles for my husband to blow out by himself. Isn't this a great picture? Lots of hot air!


This next post shows a technique with glossy card stock, white embossing powder and Adirondack dye inks. If you're in a hurry this is the technique to do. It makes a quick but elegant card.


The Hero Arts stamp was embossed with white embossing powder and place about 1" above the bottom edge of the cardstock. Using a make-up wedge I lightly swirled Conch Shell, Peach Bellini and Beach Glass Adirondack dye inks over the entire surface. Don't overlap the inks because they will get muddy in color. Light color inks are the best when you try this for the first time. I used a soft tissue to wipe off the embossed image to remove any ink residue. A few pearls in the center of the flowers add a little elegance to these cards. The verse, butterfly and dragon flies were stamped with dye ink. Since this is glossy cardstock be careful when you stamp the black, the cardstock is slippery and it takes a minute or two for the ink to dry. If you're in a hurry you can heat set the black.


The next photo shows one card with darker dye inks and on the other card I used gold alcohol ink with blender added to the felt.


The darker dye inks can be blotchy so swirl very lightly and test on scrap paper before applying to the glossy cardstock. Try it...you'll like it! Leave me a comment after you try it.

Back to creating cards in my Butterfly Garden.

Tuesday, November 09, 2010

Holiday Set


I thought I would share a photo of the entire set of 10 cards made with stickers, ribbon and brads that were bought at Hobby Lobby.


Here is photo #1:


This is photo #2:


This next photo shows the verses on the inside of the cards:

Have you started your Christmas cards? Perhaps this will inspire you to get creative.

Back to creating cards in my Butterfly Garden.

Wednesday, November 03, 2010

Holidays 9 & 10

On these last two cards I have used the remaining 5 stickers. It is amazing what you can create with stickers, ribbon, brads, Nestabilities and Cuttlebug embossing folders. I didn't use a single stamp on the outside of these cards.


This is card #9:


If you are looking for the stickers they are the 2 holly leaves on the top corners of the card.


Card #10:


That completes the set of 10 cards. Remember all those stickers you just had to buy? Well get them out and start creating. I stamped verses on the inside of the cards and will post a photo next time.

Back to creating cards in my Butterfly Garden.

Tuesday, November 02, 2010

Holiday 7 & 8

I have used 18 different stickers on the last 6 cards. Cards 7 & 8 use 2 more stickers, one for the tree and one for the gingerbread man.


Here is card #7:


I inked the raised image of the Cuttlebug folder with dye ink before I embossed it. After embossing the house and trees were green and recessed (debossed). I used the debossed side of the dotted swiss Cuttlebug folder to match the debossed house.


Card #8:


A Cuttlebug wreath folder was used to embossed the "whitewashed " cardstock. After sanding the leafy raised areas, I applied red colored pencil to the poinsettias. I used a craft knife to cut out the center of the wreath.

There are 5 stickers left and two more cards that I will post tomorrow.

Back to creating cards in my Butterfly Garden.

Monday, November 01, 2010

Holidays 5 & 6


A jolly Santa and a snowman are cards 5 & 6. It was really fun trying to find different layouts to compliment the stickers. I didn't want to add too many embellishments so I tried to stick with the ribbon and brads that I purchased at Hobby Lobby. A few pearls were added for a little more "bling" without taking away from the simplicity of the card.


This is card #5:


The Snowman is card #6:

More cards tomorrow. If you have any questions leave a comment or e-mail me. Are you in the holiday mood yet?

Back to creating cards in my Butterfly Garden.

Sunday, October 31, 2010

Holidays 3 & 4

As promised here are two more cards that I created with the package of stickers that I bought at Hobby Lobby. I tried to use the same Cuttlebug embossing folders and Nestabilities on most of the cards.


Here is card #3:

Card #4:

Back to creating cards in my Butterfly Garden.

Saturday, October 30, 2010

Holidays

I noticed that the store have all of their Christmas merchandise displayed. Christmas may not be in the air but it is definitely in the stores! The displays inspired me to create some early Christmas cards. While at Hobby Lobby I bought a package of Christmas stickers, brads and 2 rolls of ribbon.


There was a definite "country/vintage" feel to these stickers so I chose to use kraft paper for most of the cards. The red on the stickers was closer to a brick color not the traditional bright red you associate with Christmas. The greens were also muted. I used cardstock colors that closely matched the hues in the stickers.


I was able to make 10 cards with the package of stickers. Here is card #1:


Here is card #2:


I will post 2 cards every day. Stop by tomorrow and see the next two cards. If you like what you see please leave a comment. I would love to hear from you.
Back to creating cards in my Butterfly Garden.

Saturday, October 16, 2010

An "Inky" Thanksgiving


These are cards I made with an Inky Antics clear rubber stamp set. This year I used this set for all of my Thanksgiving cards. I get bored doing the same card over and over again so I usually pick a stamp or stamp set for each holiday and make many different variations with the same stamp. I like to be able to change the appearance of my cards by using different papers and layouts. All the cards were colored with Prisma colored pencils and Gamsol. The "Inky" website has great directions for blending colored pencils with Gamsol. Check it out!
When I was growing up I was told "you never mix patterns on the clothes you are wearing". If you had a solid color skirt or pants you could wear a patterned top...but never mix plaids with stripes or flowers or paisley. I have noticed that many cards incorporate many patterns on one card. Keeping this in mind this is my attempt at mixing patterns. ENJOY!


Here are four of the cards:


A leaf shaped button, regular button, leaf punch, ribbon, twine, patterned papers and Nestabilities enabled me to get a different look on each card. I love adding embellishments ...I think that is when a card really comes to life.


Here are four different versions:


More patterned papers, ribbons buttons, twine, brads, leaf punch, embossing powder and of course Nestabilities all helped to create different layouts.


Whenever I show someone a card they always open it up to see what's inside so...here are a few insides:


Back to creating cards in my Butterfly Garden.

Thursday, October 07, 2010

STAMP OASIS @ SCS Flower City Gathering

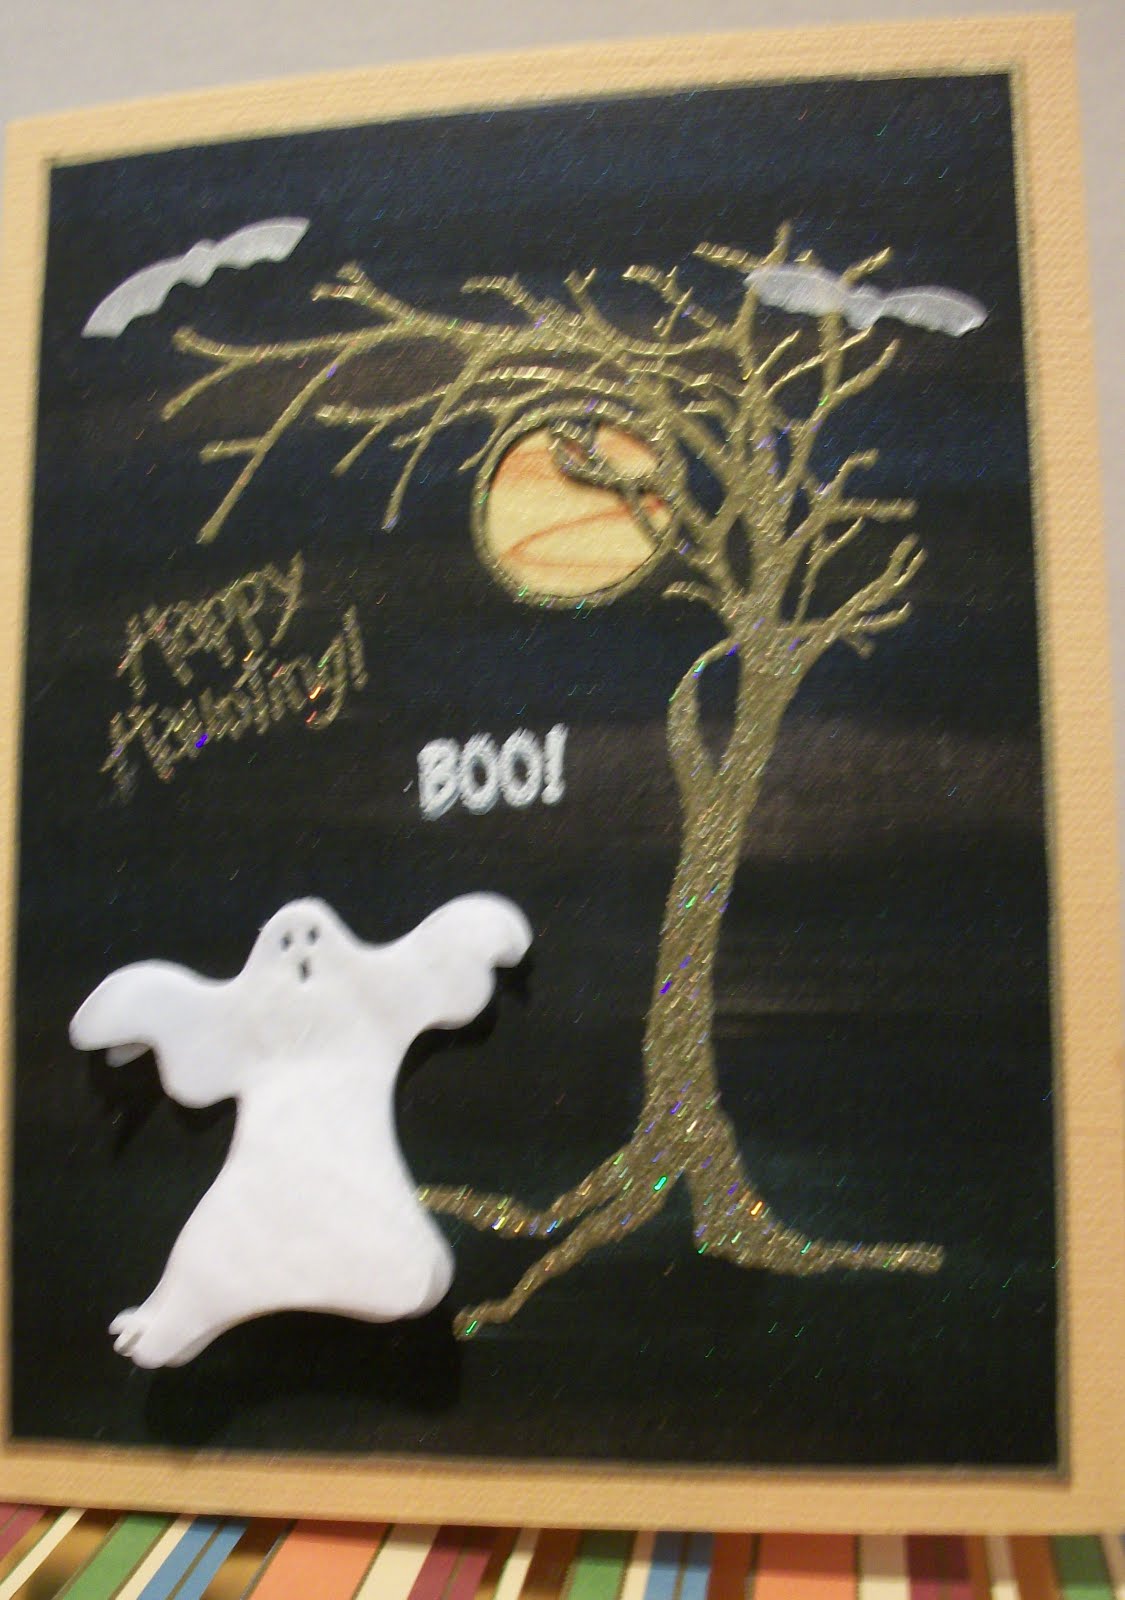
Last Saturday, October 2, 2010, I participated in the Flower City Gathering in Rochester New York. It was a day full of stamping, friends, food and fun! I got this marvelous stamp in my "goodie bag". It is called "Spooky Tree" a Stamp Oasis stamp courtesy of Rubbernecker Stamps. Thanks to the wonderful people at Rubbernecker Stamps I was able to create this Halloween card.


Opalite ink pads using the direct to paper technique were applied to black cardstock. It is hard to photograph the sparkle that these ink pads add to dark cardstock. In the photo below you can see a few different shades of color on the background and a little of the sparkle.


I used Versamark and Egyptian Gold to emboss the "Spooky Tree". Isn't this the greatest Halloween tree you have ever seen! A Terra Cotta ink pad was streaked over a piece of gold stardream paper and was used for the moon which had been cut out with a craft knife. Several layers of tissue paper were used to die cut the Sizzix ghost. The bats (on the same die) were cut out of white stardream paper.


A glue stick was used only on the head of the ghost so that the layers appear to float.

Check out Rubbernecker Stamps to see the other stamps that they have. I think you will love what you see. I visited their site and have a list of stamps that I want to order.

Back to creating cards in my Butterfly Garden.

Asian Part II

Here are a few more Asian cards using the same paper that was used in the last post.


The stamp used in the photo below is a "Kodomo" stamp. The coloring was added using Prisma colored pencils and Gamsol. The embossed areas were done with JudiKins Egyptian Gold. A fine gold thread (JoAnn's) was wrapped around the green cardstock for a little "bling".


Here is another legend about the Maneki Neko (beckoning cat) shown in the above photo :

An old woman living in Imado (eastern Tokyo) was forced to sell her cat due to extreme poverty. Soon afterwards the cat appeared to her in a dream. The cat told her to make its image in clay. She did as instructed, and soon afterward sold the statue. She then made more, and people bought them as well. They were so popular she soon became prosperous and wealthy.


More interesting info:
The Maneki Neko (招き猫?, literally "Beckoning Cat"; also known as Welcoming Cat, Lucky Cat, Money Cat, or Fortune Cat. Sometimes incorrectly labelled Chinese Lucky Cat is a common Japanese sculpture, often made of ceramic, which is believed to bring good luck to the owner. The sculpture depicts a cat (traditionally a Japanese Bobtail) beckoning with an upright paw, and is usually displayed—many times at the entrance—in shops, restaurants, pachinko parlors, and other businesses. In the design of the sculptures, a raised left paw supposedly attracts money, while a raised right paw protects it.


Pachinko (パチンコ?) is a Japanese gaming device used for amusement and gambling. A pachinko machine resembles a vertical pinball machine, but with no flippers and a large number of relatively small balls. The player fires a ball up into the machine, controlling only its initial speed. The ball then cascades down through a dense forest of pins. In most cases, the ball falls to the bottom and is lost, but if it instead goes into certain pockets, more balls are released as a jackpot. Pachinko machines were originally strictly mechanical, but modern ones have incorporated extensive electronics, becoming similar to video slot machines. The machines are widespread in establishments called "pachinko parlors".


Enough knowledge for the day back to the cards.


The fan in the photo below is Washi Paper Quilting. I purchased the supplies from Hanko. The fan is actually "puffy" just like a quilt. Unfortunately the photo doesn't show this.


This last photo shows more gold thread and a small good luck charm that was purchased from Sky Blue Pink. Kodoma stamps and prisma colored pencils were used on the floral section.


Back to creating cards in my Butterfly Garden.