Monday, December 06, 2010

6th day of Christmas

Lots of snow! The almanac predicted cold but not much snow this winter. Well if this is a precursor of things to come...we're in big trouble. Not only is it cold but we have about 16" of snow. So much for the almanacs predictions.


I have been listening to Christmas songs the last few days. This song is on "repeat" in my head...."I'll have a blue Christmas without you...." so today's card is blue. A welcome break from the traditional red and green.


The mother in me wants to know "Where are your gloves?" It is clearly snowing in this photo but her hands are bare.

Cuttlebug embossing folder, Nestabilities die, and Fiskar corner punch were used to create this card. I sponged Stazon opaque cotton white over the raised design in the blue background and Vintage Photo on the edges of the remaining pieces. In honor of "bling" (that I truly love using), I put three pearls on the top right corner and three on the bottom left corner. See you tomorrow!

Back to creating cards in my Butterfly Garden.

Sunday, December 05, 2010

5th day of Christmas

Today was a great day because four of my grandchildren came over to decorate gingerbread houses. They are so inventive and their house reflect their creativity. Each one had an idea to try on his or her house and were willing to share that idea with everyone. They were able to "CASE" each other. Here is how the houses looked before they started decorating.


The geniuses at work:

They were encouraged to taste test everything! Licking fingers was one of the best ways to be sure that the frosting was tasty.


Concentration helped get the snow on the roof to look perfect. The snow looks just like that on the toop of my house today!


Sometimes they used a butter knife instead of fingers and if the frosting got on the fingers all the better to lick off!


Adding snow to the green roof with a peppermint walkway. How cool is that!


The completed housing project:


There is a "ham" in every family and and it was difficult to get them to be smile for a picture so the in the next photo they didn't have to be serious and they weren't!!


Here is the card for the fifth day of Christmas:


See you tomorrow!

Back to creating cards in my Butterfly Garden.

Saturday, December 04, 2010

4th day of Christmas

Today is day four of the Vintage Christmas card series. Three weeks from now the hustle and bustle will be all over and the bills will start arriving. I hope you have all of your Christmas cards made and most of your shopping done. I started wrapping today so that I could take inventory of what I bought and who else I need to buy for. Tomorrow is gingerbread house day and four of my grandchildren will be coming over to decorate. They will each have a house to decorate. The remaining grandchildren will be decorating next Sunday. I love to see how creative they are.


Here is the card for today.


Cuttlebug embossing folder, Nestabilities, Tim Holtz music stamp, Vintage Photo dye ink were all used on this card. See you tomorrow!

Back to creating cards in my Butterfly Garden.

Friday, December 03, 2010

3rd day of Christmas

Day number three and a third card. This image is from the Vintage Christmas Card book and CD sold at Dover Publishing.


All papers were sponged with a Vintage Photo dye ink pad. Background was created with a Cuttlebug embossing folder, image was cut with a deckled oval Nestability die, layered on top of another green paper cut with a Nestability die. The scalloped border at the bottom was made with a Martha Stewart edger punch. Gold pearls were added for a little "bling". See you tomorrow!

Back to creating cards in my Butterfly Garden.

Thursday, December 02, 2010

2nd day of Christmas

This is the card for the second day of Christmas. The image is from the same CD as in the previous post. I'm really lovin' this vintage look.


The holly leaves in the corners were from a Sizzix die. The embossed background is a Sizzix embossing folder. I sponged Vintage Photo dye ink around the edges of the photo to give it a more antique look. The background has Vintage Photo dye sponged over the entire surface of the raised image. Rhinestones in center of the holly for a little bling. See you tomorrow!

Back to creating cards in my Butterfly Garden.

Wednesday, December 01, 2010

1st day of Christms

"Everything old is new again". Vintage seems to be very popular this year. So my contribution to this new fad, will be one vintage Christmas card a day for the next 12 days. I bought a vintage book and CD from Dover Publishing and the images on these cards are from the CD.


1st day of Christmas:


This definitely a jolly ol' Santa and a very angelic little girl. The background papers were from a K and Company pad. The rectangular image was cut with a Nestability die and a corner punch was used to soften the shape. The scallop behind the image is cut with a Nestability die. The green paper was scalloped with an EK success edge punch. A Sakura stardust pen was used to add highlights to the image. See you tomorrow!

Back to creating cards in my Butterfly Garden.

Friday, November 19, 2010

Birthdays and Glossy Cardstock

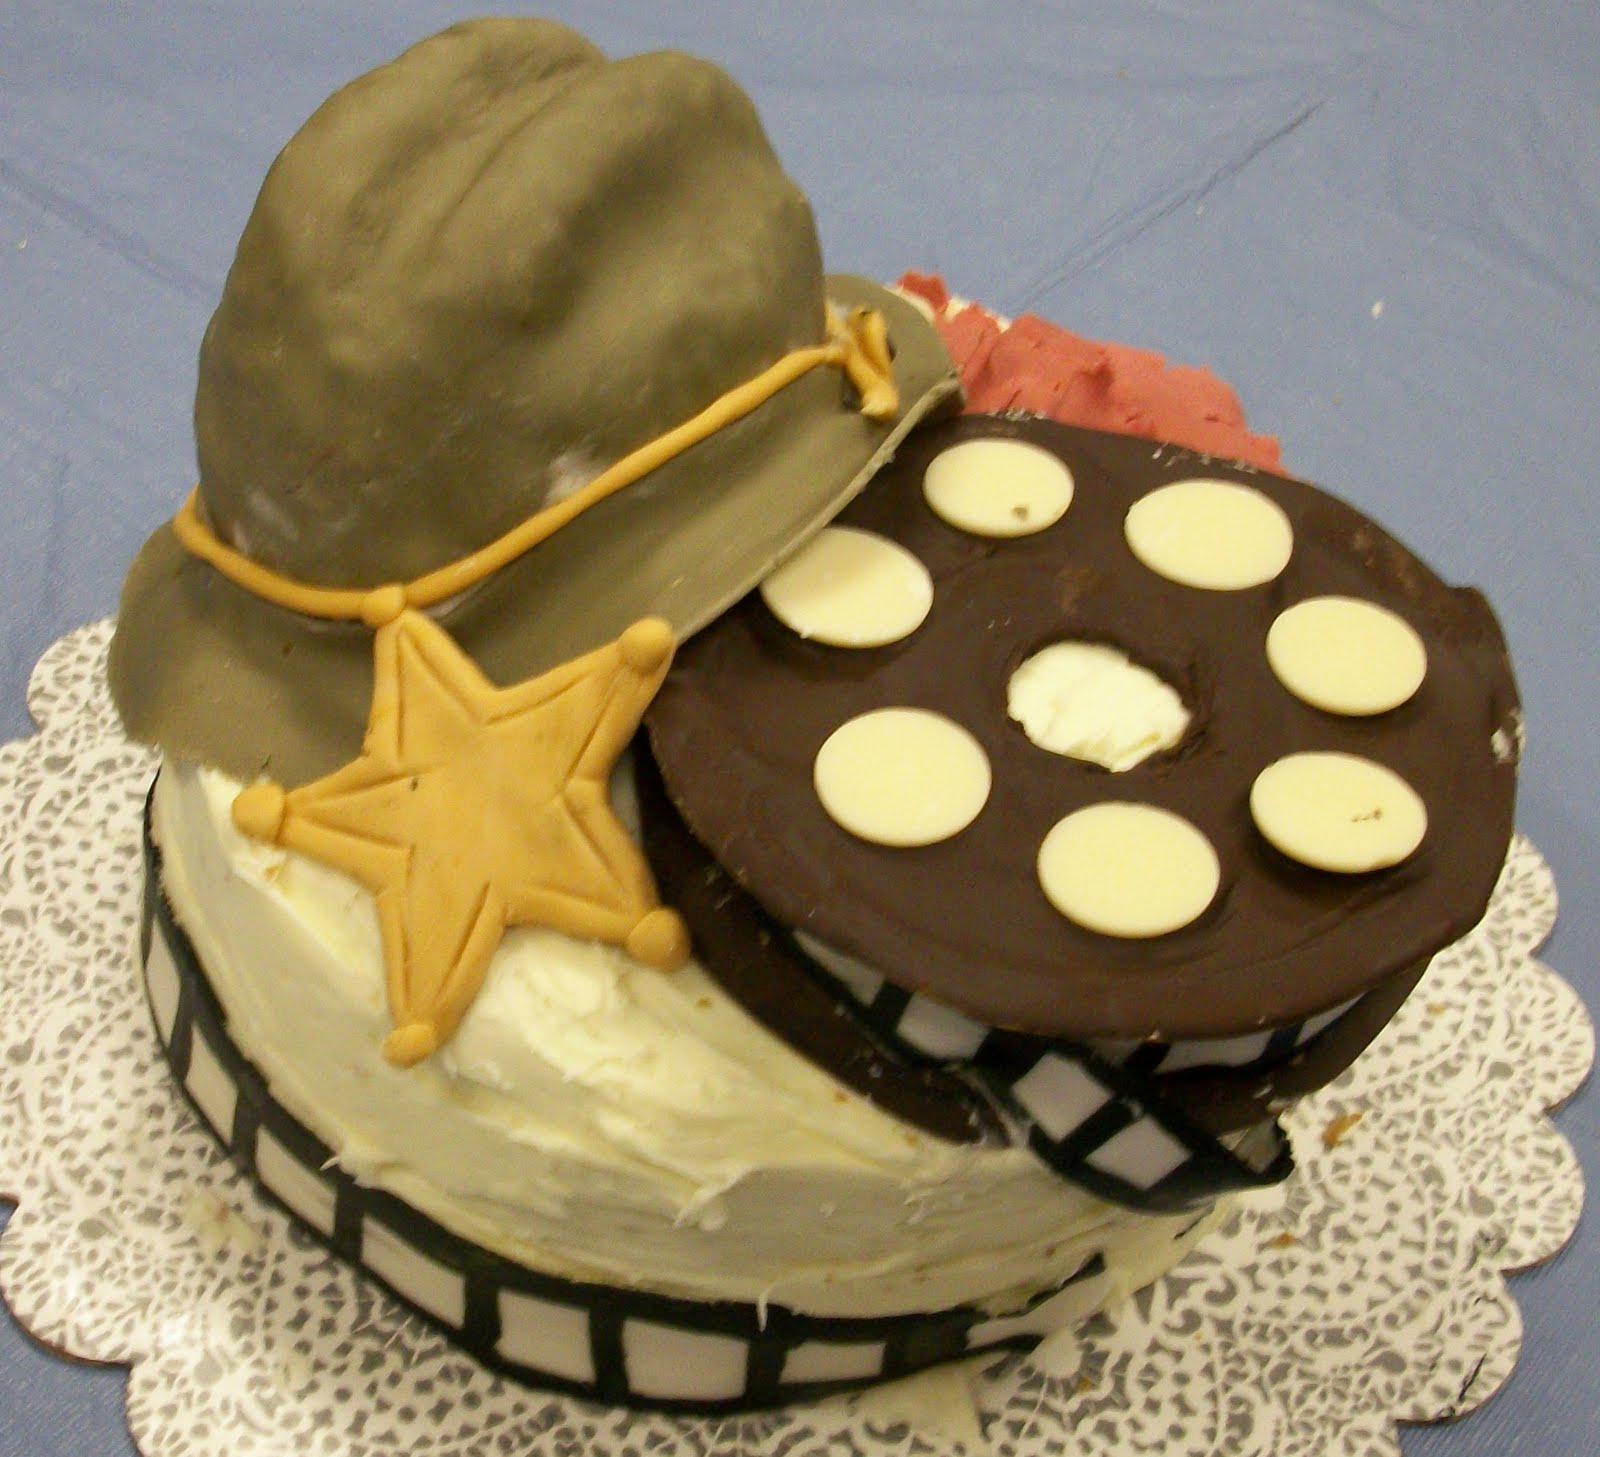
My granddaughter created another birthday cake. This was for my husband's birthday. He loves western movies, especially the old black and white movies. So this is the cake she made in his honor.


The hat is molded rice krispie treats covered with fondant. The sheriff badge is rolled fondant.


Here is another view that shows the movie reel. She drew circles on waxed paper, then filled the circles with melted chocolate. When the chocolate set she used these for the top and bottom of the reel. The circles on top of the reel were white chocolate melts. The film cascading around the cake was rolled fondant that was painted with black food coloring.


It was difficult to put candles on this cake so I made some cupcakes. My husband and my 2 youngest grandsons are in this next picture and the oldest is helping blow out the candles. I guess there were too many candles for my husband to blow out by himself. Isn't this a great picture? Lots of hot air!


This next post shows a technique with glossy card stock, white embossing powder and Adirondack dye inks. If you're in a hurry this is the technique to do. It makes a quick but elegant card.


The Hero Arts stamp was embossed with white embossing powder and place about 1" above the bottom edge of the cardstock. Using a make-up wedge I lightly swirled Conch Shell, Peach Bellini and Beach Glass Adirondack dye inks over the entire surface. Don't overlap the inks because they will get muddy in color. Light color inks are the best when you try this for the first time. I used a soft tissue to wipe off the embossed image to remove any ink residue. A few pearls in the center of the flowers add a little elegance to these cards. The verse, butterfly and dragon flies were stamped with dye ink. Since this is glossy cardstock be careful when you stamp the black, the cardstock is slippery and it takes a minute or two for the ink to dry. If you're in a hurry you can heat set the black.


The next photo shows one card with darker dye inks and on the other card I used gold alcohol ink with blender added to the felt.


The darker dye inks can be blotchy so swirl very lightly and test on scrap paper before applying to the glossy cardstock. Try it...you'll like it! Leave me a comment after you try it.

Back to creating cards in my Butterfly Garden.

Tuesday, November 09, 2010

Holiday Set


I thought I would share a photo of the entire set of 10 cards made with stickers, ribbon and brads that were bought at Hobby Lobby.


Here is photo #1:


This is photo #2:


This next photo shows the verses on the inside of the cards:

Have you started your Christmas cards? Perhaps this will inspire you to get creative.

Back to creating cards in my Butterfly Garden.

Wednesday, November 03, 2010

Holidays 9 & 10

On these last two cards I have used the remaining 5 stickers. It is amazing what you can create with stickers, ribbon, brads, Nestabilities and Cuttlebug embossing folders. I didn't use a single stamp on the outside of these cards.


This is card #9:


If you are looking for the stickers they are the 2 holly leaves on the top corners of the card.


Card #10:


That completes the set of 10 cards. Remember all those stickers you just had to buy? Well get them out and start creating. I stamped verses on the inside of the cards and will post a photo next time.

Back to creating cards in my Butterfly Garden.

Tuesday, November 02, 2010

Holiday 7 & 8

I have used 18 different stickers on the last 6 cards. Cards 7 & 8 use 2 more stickers, one for the tree and one for the gingerbread man.


Here is card #7:


I inked the raised image of the Cuttlebug folder with dye ink before I embossed it. After embossing the house and trees were green and recessed (debossed). I used the debossed side of the dotted swiss Cuttlebug folder to match the debossed house.


Card #8:


A Cuttlebug wreath folder was used to embossed the "whitewashed " cardstock. After sanding the leafy raised areas, I applied red colored pencil to the poinsettias. I used a craft knife to cut out the center of the wreath.

There are 5 stickers left and two more cards that I will post tomorrow.

Back to creating cards in my Butterfly Garden.